
One product, four backgrounds: a reusable image workflow
A background variation workflow keeps the product reference close while exploring several scene directions. This saved template uses a white sneaker reference, text nodes for four ideas and four image result nodes. The graph makes those branches visible in one canvas.
What is in this saved workflow?
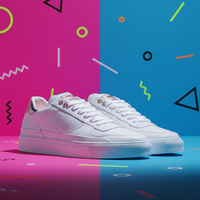
The graph contains 13 nodes and 19 connections: one reference image, four result images and eight text nodes. A text branch develops four background ideas and turns them into separate scene briefs. Each result image has a connection from the same product-reference node. The saved previews show architecture, a neon street, foliage and a bright graphic setting.
13 nodes · 19 connections · Existing reference media
Reference and saved previews
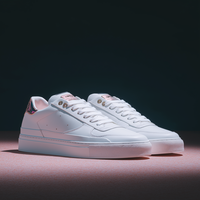
Open the reference preview
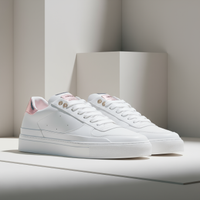
Open this saved preview
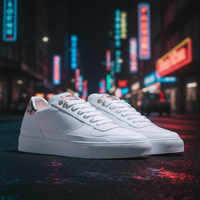
Open this saved preview
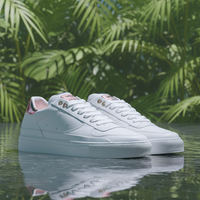
Open this saved preview
Open this saved preview
| Saved model key | gpt-image-2 |
|---|---|
| Saved aspect ratio | 16:9 |
| Saved resolution setting | 1K |
These are saved preset values, not the record of a new run. Current model availability, inputs and quotes are shown in the creation tool.
How to adapt the workflow
Use one reference for the product
Choose your own clear product image. Keep it connected to each result branch so the product reference remains visible beside the variants. A shared input makes comparison easier; it does not prove that every detail will stay identical.
Develop distinct background directions
The saved workflow separates background ideas into text nodes before the image branches. Give each direction a clear visual purpose, such as quiet studio geometry, an evening street, a natural setting or a colourful graphic scene.
Combine the reference with each scene brief
Each of the four result nodes receives the product reference. Related text nodes carry the background direction. The image nodes save gpt-image-2, 16:9 and 1K as preset settings; current model controls still need to be checked when preparing a new task.
Compare a small set before expanding
Review the variants together. Choose the direction that suits the product and the placement, then refine the scene or light. Several branches make the plan easier to compare, but the snapshot is not a record of a timed batch run.
Prompt logic and a brief to adapt
The saved text nodes separate the desired scene from the product reference and reuse that pattern across four branches. Some source instructions ask for exact product preservation. Treat that wording as an aim of the prompt, and verify the actual shoe outline, materials and details in each result.
The following is a new editorial practice brief, not a copy of the saved prompt and not the prompt used to produce the previews above.
Use my product reference as the subject. Place it on a pale studio platform with soft side light and a quiet geometric background. Keep the product shape, materials and markings consistent with my reference. Adjust the contact shadow to the new surface and leave clear space for the intended layout.
What to check in your own result
- Compare the shoe outline, sole, stitching, laces and markings across all four previews and against the reference.
- Check contact shadows, reflections and light direction so the product appears grounded in each scene.
- Review the original-size output before delivery. The saved gallery here contains small square previews, while the preset records a 16:9 setting.
What the example establishes
The media shown here are existing reference-template previews, each 200 × 200 pixels. They demonstrate the saved scene directions, not the detail of a final export. No new images were generated for this article. The snapshot does not provide a verified run date, seed, billed amount, speed comparison or a guarantee of identical product details.
Source and scope
This walkthrough reviews 产品批量换背景, a TapNow reference template already included in the public canvas library. The library entry was reconstructed from visible template content; it is not an original project export. Source media are displayed from their existing public preview links.
To find the workflow, open a canvas, choose Templates and search for 产品批量换背景. Replace the reference with your own material before preparing a task. Template source platform: TapNow.
Prepare your next step
Read the complete prompt guide or explore the creation tool. When you are ready to generate, sign in and review the selected model, supported settings and quote.